Fabric face masks - manufacturing method
Making your own fabric face masks is not difficult. The main criterion when choosing a fabric is its ability to absorb. As a rule, these are cotton fabrics.
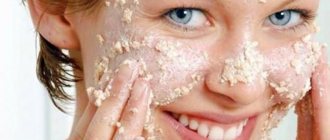
To make it you need to take cotton fabric without a pattern. From it, cut out the base of the mask with slits for the eyes, nose and mouth.
Gauze folded in several layers is also suitable. Another option is purchased compressed masks - tablets. They need to be removed from the packaging and placed in the prepared composition for the mask. After a few minutes, take out the soaked mask and spread it over your face.
How to prepare special Neem masks for acne and scars with your own hands?
Here we will talk about other ways to prepare masks. Neem can be combined with other medicinal plants and ingredients. How? More on this below.
Recipe 1: Neem and aloe mask
Use ingredients:
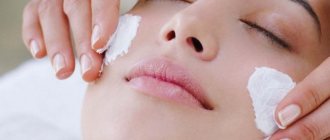
- 2 teaspoons fresh aloe vera gel
- Neem leaves - the leaves should fill your hand
- 1 teaspoon natural raw honey
- 2-3 basil leaves - this is an optional ingredient
Wash the neem leaves under cold water. Add water to neem leaves and grind until you get a paste-like consistency. Then add aloe vera gel and natural honey. If the mask is too thick, you can add water.
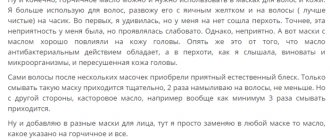
Once your neem and aloe vera mask is ready, apply the paste to your face. Avoid contact with the area around the eyes and lips. These areas are sensitive and may become dry. You can keep the mask on for 10 minutes.
Recipe 2: Neem mask + lemon
Neem and lemon are two natural ingredients that are very effective in treating problematic mature skin. Grind a few neem leaves to make a thick paste or use readily available neem powder. Squeeze a whole lemon into the paste and add some water. Mix everything thoroughly. Apply the mask to your face and neck and leave to dry for the next 15 minutes. Wash your face with warm water and pat dry with a clean towel.
The acidic concentration of the paste helps maintain your skin's pH level and reduces the production of excess sebum and oil. This will also prevent the appearance of new acne. And all thanks to the fact that the production of sebum from the pores of the skin, where bacteria multiply, decreases. The paste acts as an ointment against acne. The antioxidant properties of the mask help fight acne marks. Neem is also high in vitamin E, which also helps correct uneven skin tone and brighten the skin.
Preparing facial skin for using a sheet mask
Before using the mask, the skin needs to be prepared:
- Remove makeup and dirt.
- You can steam it over steam or use a compress. Steaming is necessary for better penetration of beneficial substances into the epidermis.
After completing the preparation stage, use a fabric mask.
Pattern and diagrams of a leather plague doctor mask
First of all, for sewing you need to prepare paper patterns. Subsequently, they can simply be applied to natural leather, carefully outlined with chalk and the necessary elements cut out.
The pattern for a leather mask consists of the frontal, lower and side parts
The dimensions of the product must be determined individually by measuring the parameters of your head. But usually the beak length is about 25 cm, and the height of the frontal part is about 10 cm.
The total height of the accessory from base to top is about 24 cm
Based on paper templates, a pattern for a plague doctor mask is cut out of leather. You can prepare straps for fastening and fragments for eyepieces in advance.
Sewing leather is quite difficult, so it is customary to use only 4 large elements
When the blanks are cut, you will need to immediately make holes in them. It will not be possible to fasten the elements together with a regular needle; for leather you will have to use a punch or a sharpened awl.
Sew a leather plague mask along pre-made holes
Advice! Before preparing leather cutting, it is recommended to first try on a paper model on your head. This will allow you to adjust the size if necessary and not waste time and leather material.
Fabric face masks - conditions for obtaining maximum benefits
To get the most useful result, you need to consider the following:
- Home remedies do not contain preservatives, so they cannot be stored.
- The composition must be prepared just before use.
- You need to mix the components in glass, porcelain or plastic containers, without using metal ones. Upon contact with metal, many components react. This negatively affects the quality of the mask and its benefits.
- The skin is cleansed before using the mask.
- If discomfort occurs during the procedure, use of the fabric mask should be stopped immediately.
What is a neem plant?
Neem, Neem is a tropical wonder tree popular in India and Pakistan. Grows up to 16 meters in height. Loves warmth. Can grow indoors in very large pots, minimum 10 gallons. All parts of the tree are used in cosmetology: fruits, leaves, branches, bark. For example, tea made from leaves and branches is used to treat skin diseases, control blood pressure, and cleanse the blood.
It contains a substance that is used as a spermicide (contraceptive), fungicide (against fungi), and antiviral. Used against malaria. Chewing branches is good for dental health. Repels insects. If you place the leaves in a closet with clothes, moths will never appear there.
The antibacterial agent is successfully used against staphylococcus and salmonella. And neem oil is a very popular remedy for lice and psoriasis. It is a natural pain reliever and anti-inflammatory. The fruits are used to treat genitourinary diseases, against worms, and leprosy.
In cosmeceuticals, neem is used to treat wounds, burns, sprains, bruises, headaches, fever, sore throat, food poisoning, colds, flu, hepatitis, mononucleosis, fungal infections, yeast infections, sexually transmitted diseases, acne, skin conditions, diseases heart and blood, kidney pathologies, digestive problems, ulcers, periodontal disease, nervous disorders, malaria, fatigue, etc. It is part of some drugs for the treatment of AIDS, cancer, diabetes, allergies.
Instructions for creating an AR mask
Rules. Instagram will not allow masks that:
- Depict weapons, suicide, mutilation
- Linked to eating disorders
- Provoke bullying and insults
- Showing sexy scenes
- Shows human exploitation, shocking images
- Demonstrate alcoholic drinks, smoking scenes, gambling, prohibited goods
- Replace faces with photographs of other people
- Negatively highlight body parts
- Violate others' copyrights
- Cover most of the face and make the person unrecognizable
These are not all, but the most basic rules. And they can also change. For example, it used to be possible to create very strange effects that obscure the face or distort it beyond recognition. Today such a number will not work.
If your idea does not violate Instagram rules, proceed to the first step.
Previously, it was possible to create effects that greatly change the face. But now it’s impossible.
Download Spark AR
This is a program in which you will create your effects. It runs on Windows and macOS. There is also a mobile application for Android and iOS - in case you want to create masks on your smartphone.
When you download and launch, the program will ask you to log in to Facebook. Otherwise, the application will not let you in. Don't be afraid that attackers will steal your personal data. The app is owned by Facebook, so everything should be fine.
We are starting a new project
When you first launch the application, you will be prompted to study an example of one simple project. You will still have time to see it. How to get training - there is a whole Learn section. It’s better to immediately create a new project: section Create New → New Project.
Studying the interface
The program interface will open in front of you, divided into three parts:
Scene assembly area
- on the left side of the screen, where the Scene, Layers and Assets buttons are.
General view display area
- the central part of the window. This displays what the user sees on the front camera and how the mask will appear on the face. To make it easier, the developers looped several videos with faces. You can switch them in the Video tab on the left. Here you can switch to the front camera of the laptop.
Options area
- on right. It is also called the inspector zone. Options and parameters for the different objects that you will add will be displayed here.
There are many buttons in each field. We advise you to try them out, look around and get comfortable with the interface before starting work. If it’s difficult, here’s a tutorial from Facebook on Spark. There are scraps and everything you need to figure it out. And here are video tutorials on creating masks in Spark AR on YouTube.
General view of the interface when creating a new project. You can expand the work area with the mouse, increase the size of the looped face, and even select a mobile device for display. For example, choose Nexus 7 instead of the pre-installed iPhone.
Adding face tracking to the project
The most important thing for masks is to find a face and identify their face on the screen. Fortunately, the app handles this setting on its own. To make it work:
- On the left side of the Scene panel, click the Add Object button
- A window will appear. You need to find the Face Tracker button in it
- Select this option and click Insert
If you haven’t noticed any changes, look at the projection of your face in the work area. There appeared coordinate axes from the center of the face.
Further:
- On the left in the Scenes block we look for the faceTracker0 object
- Right-click on it, select Add Object in the drop-down window, and then Face Mesh
- The application will select the character's face and paint it with a checkerboard texture
The program interface after adding the Face Mesh object. This is the structure of the mask, the application recognizes the face and adds a special script that will determine the coordinates of the face on the screen. The same can be done if you switch to a webcam.
You technically already have a mask, congratulations. You can even test it: connect your phone to the PC, open the Spark application on it, and then on the right panel find the image of the smartphone, the button is called Test on Device.
You can rejoice at your success. But not for long. All your mask can do is fill your face with a black and white checkerboard texture. Not much yet.
Creating material for the face
When you've had enough of playing with the mask, return to the app. There, in the area on the left, find the faceMesh0 object and click on it. The area on the right will display your mask settings. For example, you can choose whether to leave holes for the eyes and mouth - check the Eyes and Mouth boxes, view the coordinates, and adjust the position.
In the same block you will find the Materials tab - expand it by clicking on +. Whoosh, and your first material is created. Materials are objects in the program with a set of properties that will adjust the display of your mask. You can only enable one material per object, but you can then apply it to different objects. In short, everything is complicated - don’t worry about it yet. Your mask has become gray instead of a checkerboard one - rejoice!
After creating the first material, the mask will turn gray. This is his property. Properties can be changed, for example, painting the mask a different color.
In the Assets block, a Materials folder has appeared in the lower left part - it contains all your materials. Other objects that you add to the scene will immediately appear.
If you click on the added material (it's called material0), a bunch of different options and parameters will open in the area on the right. You can play with them: click and see how the mask changes. For example, if you want to change the color, go to the Shader Properties → Diffus → Color tab. If you want to change the transparency, use the Opacity panel, and if you want to add shine, check the Specular box. In short, you can play around.
At the very top of this panel there is a Shader Type switch. He talks about mask display modes. There are 7 of them in total. We are interested in Face paint - this is the simplest display mode for drawing on the face. The remaining options are more complex. In our example, we will draw a Joker mask; for this we need the Face paint mode. We choose and do not pay attention to the changes.
Drawing texture
Spark is good, but he can't do everything. To create a mask texture, we need a graphics editor that supports layers. Photoshop or free Gimp will do.
When you have chosen the application, go to the Facebook Tutorial and download objects with face templates - the big pink button in the block on the right. This way you will download an archive with 3D face models and a set of textures that will correctly apply your mask to the face model.
Open the folder with textures, select one of the files in it: faceMasculine.jpg or faceFeminine.jpg. Then:
- Open the selected file in one of the selected editors
- Create a transparent layer on top
- Draw your mask
- Delete the face layer
- Save your mask as a PNG file so it is transparent.
Joker mask. To draw a beautiful mask, you need to be able to draw beautifully. This is not necessary to create a mask. You can take any other object as a texture, you don’t have to draw it yourself. The main thing is that it matches the proportions of the face. For example, here you can take a transparent file with a Batman mask.
Trying on the texture
We return to Spark. In the left panel, look for your material0 and click. We go to the panel on the right with options - look for the Texture line, click the Choose File button and add the project with the texture that we prepared in the last step.
Super! The mask is ready.
In the project, the mask did not look much like the Joker. But in the application on the character’s face it looks quite tolerable. If drawing is not your thing, don't be too critical of your creativity. Perhaps the result will exceed your expectations.
Testing
We connect the smartphone again, go into the application again, and in Spark on the PC, click Test on Device and study the results. If all is well, you can publish.
Add a mask to Insta
For now, only you and the friends you give the link can use your creation. In order for a mask to appear publicly on your Instagram page, it must first be approved by moderators.
For this:
- In the Spark main menu, click File → Export → Export. This way you export the project with the mask from the application to the PC hard drive.
- Go here. In the upper right corner there is a blue “Publish effect” button.
- Fill out the form, add a demo video, an icon and co-authors, and other things in the form. When filled out, click send.
Ready! Now your mask will be moderated. They will check it and send a response. It is not known how quickly. It happens that the effect is moderated within a week, and sometimes within a month. The only hope is luck. If the application is not rejected, after some time the mask will appear on your profile, and any user will be able to use it.
Bananas are a popular anti-aging remedy
Banana is often used in homemade cosmetic masks. It nourishes the skin (especially dry and tired), and slightly tightens, and helps prevent and even remove fine wrinkles, which are the first signs of skin aging.
Banana with cream
For the mask you need one ripe banana, which should be crushed and add 2 tablespoons of cream. Add a spoonful of honey and a tablespoon of oatmeal to this paste. Mix everything and keep on your face for about 30 minutes. The mask will dry out slightly and tighten the skin slightly. Rinse off the mask with warm water.
Banana tightening mask
A mask made from banana, honey and olive oil has a good rejuvenating effect. One ripe banana requires a dessert spoon of honey and a few drops of oil. Keep the mask on your face for 20-30 minutes (it should dry slightly). Wash off with warm water.
Banana skin mask
Another simple recipe is to take a banana, peel it and eat it.
And use the peel for your face - lightly rub the skin of your face, neck and décolleté with the inside of the peel, and feel how it tightens after a few minutes. Rinse off with cool water. The skin will noticeably soften and become silky.
Papaya for a youthful face
Another, albeit exotic, product for skin rejuvenation is papaya. But if you find it in your kitchen, you are lucky. Antioxidants and vitamins A, C and E, contained in large quantities, do an excellent job of rejuvenation.
The papaya mask makes the skin smooth, soft and acts as a natural moisturizer. It also helps get rid of skin problems - blackheads, pimples and dark spots.
Papaya mask recipe
For the mask you will need to chop about 2 tablespoons of ripe fruit, add half a teaspoon of honey and literally a couple of drops of lemon juice.
Mix the ingredients and apply evenly to the skin of the face, after 15 minutes, rinse with cool water. If you prepare this mask at least once a week, your skin will glow with youth and beauty.
Medicine in the medieval world
Of course, in Medieval Europe, medicine was in a very deplorable state and did not have any adequate methods for treating even the simplest diseases, which is why the mortality rate was very high and the life expectancy was extremely short. All the achievements of the doctors of the Roman Empire were forgotten, and the world again began to drown in epidemics and pandemics.
Due to questionable treatment methods and their ineffectiveness, people's attitude towards doctors was ambiguous. However, with the advent of the plague, there was little choice.