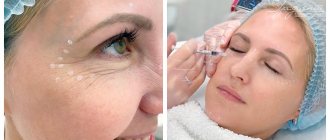
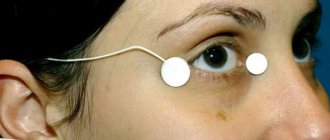
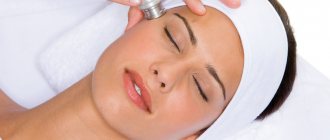
What does facial massage give?
Facial massage triggers natural rejuvenation mechanisms, eliminating the causes of aging. In addition, there are many biologically active points on the face; influencing them helps improve the functioning of internal organs. Massage also helps to better absorb hygienic and therapeutic skin care products.
Facial massage gives the following results:
- Eliminates sagging skin, removes folds, jowls,
- Reduces the appearance of wrinkles,
- Makes skin smooth, elastic and toned,
- Eliminates swelling
- Improves complexion,
- Improves blood circulation and metabolic processes.
Therapeutic strategies to prevent and manage complications
It is obvious that it is necessary to use techniques that minimize the risk of developing these dangerous complications. The text of the atlas describes, area by area, all the precautions and manipulations that must be taken to reduce this risk: the use of a cannula, the depth of injection, the quantity and quality of filler injected, and so on. Pallor of the skin and patient complaints of sudden pain in the injection area are signs that blood flow has stopped in this area. We must be able to control this situation.
All measures are aimed at restoring blood flow: urgent dissolution of the filler (if hyaluronic acid was used), warm compresses, massage, etc. Then there are prescriptions that need to be followed at home: antibiotic therapy to prevent bacterial superinfection, antiplatelet agents, topical medications.
In the introduction to the atlas I placed the inscription
“Only non-practitioners do not make mistakes; only through practice does it become possible to reduce the risk of error.”
If all measures are carried out on time and correctly, the spread of the necrosis zone will be minimal, a large area of skin will be preserved and, therefore, the chance of restitutio ad integrum will be higher.
The most popular types of massage:
- Classical. It is carried out along massage lines using gentle techniques using serums or creams. affects primarily the skin.
- Tibetan. With this type of massage, the effect is not only on the face, but also on the neck, head, and décolleté.
- Spanish. It is a combination of relaxing techniques and deep kneading of the facial muscles.
- Asahi massage. It is performed with the palms, and the effect is not only on the skin, but also on the facial muscles.
- Myofascial. Affects deep subcutaneous and muscle layers. Techniques of pinching, twisting, kneading, rubbing, and smoothing are used. Works the fascia that covers the facial muscles.
- Plucked. Performed only for oily skin, effective for blackheads, blackheads, pimples, scars.
- Honey. It is performed with patting and rubbing movements, using only liquid natural honey. Effective for maintaining skin tone and eliminating inflammation.
Face: location of the main lines
The covers tend to stretch non-uniformly when exposed in different directions. You can avoid negative consequences by following the order of actions, making movements exactly in the given direction. It’s easy to remember the rules; the principle of operation becomes clear when you become familiar with the massage lines of each section.
Chin
Most massage techniques consider the chin as the starting point. For other manipulations (washing, applying cosmetics), it is customary to touch the area first. The lines of minimal stretching of the skin of the zone are directed from the central part of the chin. Promotion is carried out by heading to the sides, upward. The actions are similar to repeating natural outlines. The lines are strictly ascending.
Eliminating, minimizing, and preventing sagging skin below the chin (formation of unnecessary borders) requires additional work on the area. Perform patting movement along the oval from the side of the neck. It is convenient to work with your fingers folded together, with the backs of your palms.
Cheeks
Having dealt with the chin, they smoothly move towards the cheeks and cheekbones. The massage lines of the zone are arranged in an arc from bottom to top. The starting points of influence are the corners of the mouth and the wings of the nose. Movements are carried out to the ears. Include the mouth area: draw a line from the midpoint above the upper lip to the upper edge of the ear.
Actions are neat. Basic principle of operation: no stretching of the skin. The progression of movements helps prevent tissue sagging. The actions are aimed at a kind of lifting of the skin. The result will be a clear, tightened oval.
Nose
The area is least susceptible to visible stretching and sagging of the integument. Skipping the zone or acting chaotically is not allowed. Massage and other procedures for the skin of the nose are carried out from the bottom up. They move, focusing on the center of the bridge of the nose. From the midline, downward movements are made to the sides. The move is not straight. The lines are a bit like an arc.
Forehead
After treating the nose, move on to the forehead. They work from the bridge of the nose. The lateral surfaces are subject to influence from the center, moving towards the temples. The full surface of the zone is treated in the same way. The massage lines are located in the direction from the bridge of the nose, the beginning is oriented towards the center of the forehead. In addition to the arc-shaped elaboration, vertical movements are made, directed from the surface of the eyebrows to the hair growth.
Eyes and eyelids
The most delicate, receptive area. Only careful, careful influences are permissible. Minimal stretching has a negative impact on appearance. Particular care must be taken to ensure the immobility of the integument. Massage lines cover the eyelids in a circular manner.
Movements are made from the inner corner to the outer, treating the surface of the lower eyelid. They return back along the upper eyelid. The movements are smooth, sliding, transition to jerky tapping is allowed. Separately, they work on the problem area of the border of the outer corner, temple (“crow’s feet”).
Sequence of massage movements
After preparing the face, they begin massage techniques. Several basic techniques are alternated: stroking, kneading and rubbing. For oily skin, you can use pinching, pressure and vibration. The face should be treated in a certain sequence along the following massage lines:
- From the center of the forehead to the temples;
- From the center of the chin to the ears;
- Cheeks from nose to ears;
- From the tip of the nose to the forehead;
- The area of skin around the lips;
- Skin area around the eyes;
- The area of skin around the eyebrows;
In the area of the lymph nodes, no strong pressure should be allowed, only gentle stroking.
Causes of facial wrinkles
The formation of facial wrinkles is associated with the motor activity of the facial muscles. Since the human face is not a frozen mask, emotions are expressed with the help of facial muscles and thousands of unconscious micromovements are performed. The corresponding areas of the skin are involved in this continuous motor flow.
Up to a certain age, our skin is elastic and after muscle contractions immediately returns to its original state. But over time, the collagen content in the skin decreases and, accordingly, its elasticity decreases. So, in places where the skin is subject to frequent deformation, creases appear, that is, facial wrinkles. The more active facial expressions, the higher the likelihood of wrinkles appearing.
Types of facial wrinkles
The most common places where the problem is observed first and most often are the forehead and areas around the eyes. Expression wrinkles on the forehead are divided into horizontal and vertical. Those who often raise their eyebrows upward develop clearly defined horizontal lines on their forehead. Those who like to put on a frown form an interbrow fold. In fact, we make many involuntary movements, forming an individual pattern of facial activity. Therefore, the appearance of a certain type of wrinkle does not always correspond to a specific emotion.
The pattern of wrinkles around the eyes also forms differently. The greatest impact on thin and delicate skin here is the habit of squinting, reacting to sunlight, or trying to see something better. As a result, “crow’s feet”—a network of fine wrinkles—appear in the corners of the eyes.
Nasolabial folds can also be classified as facial wrinkles, but facial expressions are not always the main reason for their appearance. Of course, the personal picture of the formation of facial wrinkles is influenced by the types of facial activity.
Types of facial activity
According to M. Mayo’s classification, there are 3 types of facial activity:
- Normokinetic (a person cannot always control his facial expressions, but can completely relax his facial muscles if desired. At rest, there are no facial wrinkles);
- Hypokinetic (a person has good control over the activity of the facial muscles and wrinkles only when he wants to. At rest, his facial wrinkles are completely smoothed out);
- The hyperkinetic type does not allow its owner to relax his face. In such a person it is constantly tense, so facial wrinkles soon turn into deep static furrows).
Duration of the procedure
The duration of one session is 10-15 minutes. It is advisable to perform at least 10 procedures sequentially. If the massage is performed correctly along the massage lines, the result will be healthy, toned, ruddy skin.
After the full course, your facial skin should be given a rest period of more than two months. During the massage course, it is not recommended to drink alcohol, smoke, or eat salty or very fatty foods. Otherwise, the vessels will narrow, blood circulation will deteriorate, and the face will swell.
After each massage session, you need to remove any remaining oil with a napkin or cotton pad. You can additionally apply a mask or nourishing cream to dry skin.
Possible side effects
Basically, complications arise not so much due to rupture of a venous vessel, but due to interruption of arterial blood flow due to compression or when the drug is administered into the lumen of the vessel with subsequent embolization of the terminal branches with small fragments [Fig. 3].
Rice. 3. Reasons for the development of skin necrosis. Intravasal injection (top), vessel compression (bottom).
What could happen next? Stopping arterial flow leads to necrosis and tissue death in the blood supply zone of a given vessel. Cases of necrosis of the skin of the wing and tip of the nose, lip tissue and glabella area have been described [Fig. 4–5].
Rice. 4. Necrosis of the tip or wing of the nose.
Rice. 5. Zones of necrosis.
An even more serious risk factor is associated with the fact that the facial artery represents the communication between the external and internal carotid arteries. Its terminal branch, the angular artery, anastomoses with the ophthalmic artery, a branch of the internal carotid artery. It is this connection between the vessels that can lead to embolization of the ophthalmic artery with small fragments of filler and further penetration into the central retinal artery with a possible decrease in vision up to blindness [Fig. 6–7].
Rice. 6. Iatrogenic retinal artery occlusion caused by the injection of fillers.
Rice. 7. Microembolism of the ophthalmic artery: etiopathogenesis.
Features of applying different types of creams
The cream should be applied correctly. There are different types of creams.
BB cream
Has a high degree of UV protection, 15 spf to 40 spf. It impregnates the skin with moisture and is considered a basic tool for makeup operations. Makeup artists recommend how to properly apply cream to this type of face. It's better to use your fingers. This home method is the easiest.
Before the procedure, you should warm up your fingertips. Squeeze it onto your finger and rub it with another finger. Cosmetologists love to use this method, as it allows you to get a discreet and light skin color. The cream should be warmed up and applied along the following lines on the face: frontal lobe, chin, nose and cheeks.
With this application, you can see the right amount of foundation, that is, the cream will not be applied more than necessary. After application, you need to wait a couple of minutes for the cream to dry. If there is not enough cosmetic cream on the skin area, then you should add it and check the uniformity of application. This method of applying cream is very economical.
Applying the cream with a sponge is good for people with oily and dry skin. To apply cosmetic cream with a sponge correctly, you need to moisten the sponge with water. This is necessary so that the dry sponge does not absorb moisture from the skin, but rather moisturizes it during the procedure of applying the cream.
Also, a dry sponge absorbs a lot of foundation, which is not very economical. To warm up, a pea-sized amount of cream should be applied to the palm of your hand before applying it to the skin. Then you should take a damp sponge and apply the cream. It is necessary to distribute it along the massage lines of the face with gentle strokes.
The sponge is very effective for covering up acne. It should be applied with light movements around the eyes, patting while applying it evenly. If a woman tried to apply cream in the eye area with a sponge and suddenly felt discomfort, it is necessary to apply the cream with the pads of her fingers.
Applying the cream with a brush is suitable for dry and sensitive skin prone to various redness. If a woman is not used to applying cream using this method, it can be applied with her fingers. It is advisable to use a flat synthetic brush for less foundation consumption. A small pea of cream should be squeezed onto the palm of your hand and taken from there with a brush.
CC cream
Another name is Color Corektor (color corrector). In the process of improving BB cream, the developers received a new product called CC cream. This cream should be applied with your fingers along the massage lines on your face, after squeezing a pea of cream into your palm.
Apply in circular motions near the eyes and nose. After this, the cream must be distributed over the entire face. Where there are problematic areas, the cream should be reapplied. The process of applying CC cream with a sponge or brush is the same as with foundation.
DD cream
Masks skin imperfections. Experts recommend using this cream for facial skin with signs of aging. It contains BB and CC cream. DD cream perfectly masks fine wrinkles and helps even out the skin of the face before applying makeup.
Apply this cream with your fingers along all lines of the face. Before applying, be sure to warm up the cream. This is done for a more even application over the entire face. If a woman does not want to get her hands dirty, then she can apply it with a brush or sponge. Apply DD cream in the same way as foundation.
Before applying foundation DD cream, make sure that your facial skin is clean. DD cream should not be applied around the eyes. The effect of foundation DD cream appears 2 months after use.
HER cream
Scientists are still developing it, so there is little information about it. Cosmetologists say that this cream will mask color defects in the skin. Foundation EE cream will have ultraviolet protection for the skin, and will also give the skin a natural glow and beautiful color. This cream cannot be used by people with sensitive skin.
Advantages of CC cream compared to BB cream:
- Thanks to the mineral composition of the CC cream, it has a very light texture.
- The cream contains additional substances that nourish the skin even better.
- It is good to use in summer, as it is light in texture and protects the skin from the ultraviolet rays of the sun.
- CC cream is suitable even for very sensitive skin, as it does not irritate it.
- Helps cope with redness and rosacea of the skin.
- CC cream perfectly masks pigmentation on the skin.
- CC cream is a universal product as it replaces foundation and morning skin care.
- CC cream adapts to skin color.
- Its consistency is light and easy to apply.
- It evens out the color of the facial skin, which allows you to remove minor imperfections on the face.
- Visually improves the effect on the skin, gives shine and a rested look, since it has a water-silicone base.
How to properly apply cream to your face with a brush:
- The brush must be made of natural or synthetic bristles. This brush material gives a soft feel when applying foundation.
- The cream should be applied with a brush along massage lines from the middle of the face to the hairline. Applying with a brush in a circle near the eyes avoids damaging weak skin.
Origin of massage lines
The human face is not just a picture in which an artist named Nature depicted beautiful features. It is a complex system of protective, connective and functional tissues that constantly interact with each other. Just like throughout the body, the facial tissues contain blood and lymphatic vessels that deliver nutrients to the cells and remove “waste” material from them.
So, the massage lines are not located spontaneously on the face. Their location directly depends on the location of the main lymphatic ducts, which play a huge role in creating an attractive “portrait”.
Performing mainly transport functions, lymph delivers liquid, proteins and other useful substances to the tissues of the face and neck. It is also responsible for removing toxins, salts and various breakdown products from tissues. Thus, proper and natural lymph circulation is the key to a beautiful and healthy face, the appearance of which is maintained at the cellular level.
The photo shows the location of massage lines on the face
Each massage line is located in the area of one or another lymphatic channel, and its treatment stimulates lymph circulation. Even in many eastern practices, healers used this technique, conditionally drawing so-called energy meridians on the human body.
From all this it becomes clear that massage lines of the face and neck are not just another myth invented by amateur cosmetologists, but an extremely important aspect of both cosmetic and health facial massage. Competent and correct adherence to this system will help anyone learn massage techniques and achieve the desired result.
Location of main massage lines
There are several basic diagrams that provide an example of the location of massage meridians on a person’s face. At first glance it may seem that they are all very different from each other, but in fact, each scheme is correct.
It is important to understand that each human body is individual, but the pattern of massage lines will be approximately the same everywhere. The main thing is to listen to your feelings during the procedure, and regularly monitor the effect, which occurs faster than it might seem
The result of lymphatic drainage that occurs during the massage process is noticeable within a few hours after the session, especially if the face was swollen before.
The main massage lines on the face and neck are located as follows:
- From collarbone to chin;
- From the middle of the chin through the lower jaw to the earlobes;
- From the corners of the lips to the middle part of the ear;
- From the middle of the upper lip to the top of the ear;
- From the wings of the nose through the sides to the bridge of the nose;
- From the inner corners of the eyes to the outer ones;
- From the top of the bridge of the nose to the border of hair growth.
You can see the location of the meridians in more detail and clearly in the photo. To better remember before the procedure, you can draw them on the skin - this way you can master this scheme even better. The main thing is to draw the meridians with a safe pencil, which will quickly and easily be washed off without leaving marks.
The photograph shows hand movements during the procedure
The meaning of lines in facial massage
Few people know that the location of the facial meridians determines the technique for applying certain cosmetics: creams, lotions, gels, oils, etc. When absorbed into the skin, the active components of these products affect its deep layers. If you apply them strictly along massage strips, they will spread much faster through the skin tissues and affect them in the desired way.
Thus, facial massage lines and cream application techniques are closely interrelated. This does not mean that if you apply the product spontaneously, it will not work. Just a correct, competent approach to even such seemingly trivial procedures will ensure the fastest and most reliable results.
To better remember the location of all meridians, it is also worth watching a video that clearly demonstrates their location relative to the general “geography” of the face. Having thoroughly studied this issue, you can easily take care of your skin on your own and delight others with your blooming appearance.
The skin on the face is delicate, despite the careful treatment of it, facial wrinkles still appear over time. Anti-aging creams or specially designed injections that must be performed repeatedly can help get rid of them.
However, facial massage, which is done according to certain techniques, will prolong the youth of the skin and slow down the process of the appearance of wrinkled folds.
Neck: procedure
The main purpose of massage lines is to ensure minimal stretching of the integument. By following the technique of movements during any skincare procedure, you will be able to limit the negative impact.
The effect on the skin, taking into account massage lines, will allow:
- maintain clear contours, tighten the oval;
- achieve expressiveness of features, formation of correct proportions;
- improve skin color and texture;
- eliminate swelling, congestion, flabbiness;
- get rid of age-related changes, prevent the appearance of wrinkles and sagging.
The classic scheme of action involves the neck. Many people forget an important element. A neglected neck can instantly reveal age and make the number more impressive. It is imperative to take care of the skin of the problem area.
The procedures begin by treating the décolleté area, paying attention to the neck. Smoothly moving higher
The lines of minimal stretching of the skin of the neck area are not uniformly located. In front, movements are made, moving from the chest to the border of the chin. The side surface and back are worked from top to bottom.
Some general tips
At the end of our article on how to properly apply cream to the face and neck, we will give some tips.
Always use products at room temperature - their effectiveness is significantly higher than when cold.
When scooping cream from a jar, use a special spatula or spatula - our fingers are never perfectly clean. Through them, not only moisture can get into the cream, but also bacteria, which can ruin it.
Apply the optimal amount of cream - too little amount of product will not give you the expected effect, and too large a layer will lead to swelling and clogged pores.
When applying several types of cosmetics, always start with the thinnest one. First, toner, then serum and only then cream.
How to apply cream on the neck?
Most people consider facial care a necessary procedure. Everyone does this daily ritual. Unfortunately, many people forget about the neck.
A well-groomed, fresh face and a flabby, wrinkled neck are a common phenomenon among women. Don't make these mistakes.
A few simple rules will help you avoid an unpleasant situation:
- Cleanse your neck with lotion or milk. Choose products that do not dry out the epidermis.
- After applying the nourishing composition to your face, spend a few minutes on your neck.
- The nutrient is distributed in the neck area, starting from the middle and moving to the side surfaces from bottom to top.
- The back of the neck is treated in a similar way. Many women simply don’t think about this. The skin on the back of the neck is less susceptible to sagging and wrinkles. But it is necessary to pamper it with nutrients.
- From the ears along the shoulder line, the composition is applied from top to bottom.
- The movements are light, stroking.
- Also blot off excess composition with a napkin.
- Never wipe your neck with alcohol lotions without further applying a nourishing composition. Dried, tight skin will quickly become covered with wrinkles.
Look at the photo. The massage lines marked on it will help you properly care for your neck.
Common Mistakes
It is recommended to avoid the following when using the cream:
- applying a large amount of cream - the skin will not absorb more than it can, but the product can clog pores and give an unsightly shine;
- using the composition on dirty skin - if you forget about cleansing and toning, the product will not have an effect, but will contribute to the formation of acne and comedones;
- wrong choice of cream - an unsuitable product for a certain skin type will aggravate existing problems and add new ones;
- violation of technique - failure to follow massage lines leads to stretching of the skin and destruction of its own collagen;
- incorrect movements - if you rub the skin, squeeze it again, it will lose its elasticity and firmness.
Skin toning
Tonic is a translucent or transparent liquid that contains active ingredients to further moisturize the skin. You should not neglect its use, because it is a kind of conductor between the cream and your skin, allowing the active ingredients of the cream to work better and more efficiently.
After washing, sometimes there is a feeling of tightness and dryness - the toner will help restore the pH balance of the skin, soothe and additionally moisturize it. You can apply the tonic in several ways: with a cotton pad, a non-woven cloth, spray it on your face from a dispenser and leave until completely absorbed.
By choosing the right toner for your skin type and using it every time before applying a cream, you will increase the benefits of any product, since your skin will be well able to accept the active substances contained in them. This is the final stage of the facial care procedure both morning and evening. For normal skin condition, two types of cream are sufficient - day and evening, appropriate for your age. In addition to them, you can use light serums - their rich compositions effectively nourish the skin.
Stage 2 – skin toning
Skin cleansing
The first and very important stage. Any cosmetic product should always be applied only to clean and prepared skin. In the evening, you need to remove not only the remnants of makeup, but also those impurities that have naturally accumulated on your face during the day. To do this, use special cleansing products - foam or facial gel. The main thing is that the product suits your skin, does not dry it out or injure it.
In the morning after sleep, the skin also needs to be cleansed before applying the cream to the face - in this case, the active substances of the cream will be able to penetrate deeper. Do not overload the skin and use products that are as light in texture as possible to cleanse the outer surface of the skin.
At least 1-2 times every ten days, the skin needs a deeper cleansing. Facial scrubs, light peelings and cleansing masks have been developed for this procedure - they will help remove dead skin cells of the epidermis, even out and refresh the complexion.
Stage 1 – cleansing with facial foam or gel
