The effect and benefits of facial massage, indications and contraindications for the procedure, types and features of various techniques.
The human face is a complex system that consists of various muscles and many vessels. With age, muscle tone naturally deteriorates and blood flow to the face slows down. As a result, the skin of the face loses its elasticity, swelling, hated “jowls” and senile sagging appear. Over time, it is practically impossible to do without professional help - the face needs a cosmetic massage. Our experienced specialists will carry out a set of facial massage procedures: they will work on the cervical vertebrae, lymph nodes to improve outflow, and activate blood circulation.
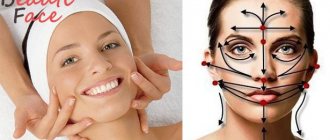
Effects of facial massage at the Doctor of Beauty clinic
1. Natural peeling.
On the skin of the face, keratinized skin particles, that is, dead scales, constantly collect, which form an entire unwanted, and even harmful, layer of the epidermis. To remove this problem, massaging your face with a professional scrub will help you. After several sessions, the skin will become smooth and radiant. Please note that aggressive chemical peels and microdermabrasion are not suitable for allergy sufferers and hypersensitive skin.
2. Establishing blood circulation.
To strengthen blood vessels and improve blood flow to the face, our cosmetologists will begin the massage process by vigorously kneading the skin. As a result of such progressive and active actions, the blood will flow to your face with renewed vigor and you will have a beautiful and healthy glow. The turgor will improve and small “sagging” will disappear.
3. Relaxing effect.
In our cosmetology clinic, the massage procedure is performed under relaxing quiet music, which will allow you to distance yourself from all problems as much as possible and finally relax. And the smell of various aromatic oils will relieve tension and calm you down. Even the shortest massage session will give you the opportunity to forget about all urgent matters.
4. Detox.
Nothing reacts to an aggressive environment like your face. Imagine what your skin is exposed to: makeup residue, endless exhaust fumes, smoking, etc. In addition, low-quality products are also a negative factor for the epidermis. The massage will naturally start the process of removing toxins - your skin will begin to breathe again, that is, function normally.
5. Facial rejuvenation.
During the process of professional facial massage, the natural production of collagen increases - the mesh of microwrinkles will begin to smooth out, and the skin will again become elastic and firm. As a result of the procedures, you will get healthier skin, and your colleagues will begin to notice that you look younger!
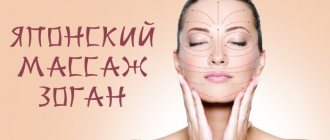
ASAHI MASSAGE: TECHNIQUE FOR SELF-MASSAGE OF THE FACE AT HOME
JAPANESE MASSAGE ASAHI – Morning sun
The real name of this Japanese massage is ZOGAN-massage (Face Creation).
In Japan, this ancient Tsogan massage technique, passed down from generation to generation, was brought back to life by cosmetologist Hiroshi Hisashi, who was given this technique by her grandmother. The Tsogan technique is also called “two-finger” massage (since it is performed mainly with two fingers - the index and middle or middle and ring fingers), or the Y-method.
Stylist Youkuko Tanako described the massage in her book “Facial Massage.” In Japan, Mrs. Tanako herself and her methods are extremely popular. Her book “Facial Massage” topped the “Top 10 Books” in Japan in 2007. Another of her books, Inspirational Exercises, took second place. To complete the comparison, Joanna Rowling's book about Harry Potter came in third place.
Among Russian-speaking people who are passionate about facial gymnastics and facial massages, the massage became famous thanks to Laina Butter, who found it in the depths of the Internet and called it Asahi Massage (in Japanese: Morning Sun), because this massage is really associated with something... sometimes bright, morning, sunny.
This is an unusually effective technique, after which the face straightens before our eyes, literally blossoms. The massage not only affects the bones (therefore it is osteopathic, returning the correct position to the bones of the skull), connective tissue and deep facial muscles, awakening them, but also revitalizes the body energetically, opening and clearing the most important channels. As a result of the massage, the structure of connective tissue noticeably improves, and the condition of the skin “returns” to 7 years ago. The face takes on a youthful appearance.
At first glance, looking at some of the techniques, it may seem that this spectacle is not for the faint of heart, and such a massage will only create new creases on the face. Actually this is not true. Returning the bones to the correct position (by the way, in Slavic, such actions are called “editing”) is impossible with light movements, as well as the deep muscles of the face, which require more careful work. And our “tender and sensitive to rough methods” skin becomes so flabby over time precisely because it bashfully covers a “pillar” of flabby muscles. Therefore, it is easier to get rid of wrinkles on the skin if we train the facial muscles than when we “carefully” take care of our own face, protecting it from the stress it vitally needs. Many oriental techniques involve quite energetic facial work - some practitioners even call, without sparing yourself, to reward yourself with strong slaps to the face every day in order to improve blood circulation in the face.
This technique requires virtually no pain, but the targeted use of reasonable force is very welcome here. Therefore, you need to perform Asahi self-massage delicately, carefully, in the area of the lymph nodes, rather slowly, but vigorously on the rest of the face.
This is a multifunctional massage-gymnastics. It is designed in such a way that it affects both superficial and deep muscles, and increases the tone of all muscles (gives a tightening effect), and is also an osteopathic practice and lymphatic drainage massage.
Before starting a massage, the skin must be cleaned. This is a mandatory requirement, because before starting the massage it is necessary to clean the ducts through which the lymph will flow.
Contraindications to massage: diseases of the lymphatic system, ENT diseases (especially inflamed tonsils), diseases of the facial skin. It is also not recommended to perform a massage if you feel sick (even during a normal runny nose), since inflammation enters the body with lymph flow. It will be great if you take care of yourself during your period: for some, menstruation is not an obstacle to massage, but for others, the bleeding may increase. Thus, there is no ban on massage during menstruation, but it is still worth watching yourself. Fatigue - for some it may be a contraindication, but for others, on the contrary, a massage will raise their tone. Here, too, you need to watch yourself.
In the original, the massage is performed using a specially developed composition of cosmetic cream with cotton. However, in the absence of this exclusive product, massage can be performed with foam, gel or massage oil.
The original massage is performed in a standing or sitting position, and throughout the entire massage you need to maintain ideal posture. According to the instructions, it is not allowed for your head to rest against a wall or on the headrest of a chair. However, European practice has introduced some relaxations to this requirement. In particular, there is a very positive experience of performing massage in a lying position. at the same time, the facial muscles seem to spread and the effect of smoothing the tissues (which in this position relax much more strongly) is even enhanced. Thus, the choice of position for the massage is yours.
As already mentioned, this massage is multifunctional. One of its functions is lymphatic drainage.
Pay attention to the pattern of lymph nodes on the face and neck. You need to massage the lymphatic system carefully and carefully, measuring your strength, making reasonable pressure along the lymph flow, but without putting pressure on the lymph nodes themselves. This is one of the fundamental rules of this massage.
Before we talk about exercises, it is necessary to look at how almost every exercise is completed. All movements in this massage are verified, go to the areas directly being worked, and most exercises end with a technique in which the movement goes to point 9 - the parotid lymph nodes, located approximately in the area between the tragus of the ear and the temple. Approaching point 9, you need to fix it with your fingers for 1-2 seconds. From there we move along the sides of the face, past the jaw joint, where we should pay attention to point 6 - the deep cervical lymph nodes (located about 2 cm under the lower jaw), fixing our fingers on this point for 1-2 seconds, then slowly moving we move down along the sides of the neck, and finish the movement in the area of lymph node 5 - in the jugular trunk, almost at the inner edge of the clavicles and jugular cavity, where we also fix the point of the lymph node with our fingers. In the figure, arrows show the route for completing the reception.
Now let’s move on directly to the exercises of the ZOGAN-massage complex.
Exercise 1. Strengthening the forehead.
Press the index, middle, and ring fingers of both palms flat against the center of your forehead. Count to 3 and apply pressure to your temples. Turn your palms 90 degrees down and, reducing the force of the impact, move them along the sides of the face to the ears, then, from the ears, perform the final movement to the pits on the collarbones, driving lymph away from the face. Repeat the exercise 3 times. Exercise 2. Strengthening the eye area. Preventing puffiness around the eyes.
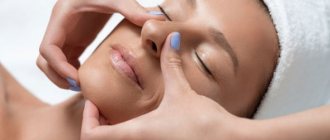
Note: The direction of some massage lines, in this, as in most other oriental massages, does not quite coincide with the classic European “pattern” of massage lines, which, by the way, are not always physiologically determined. So, in particular, in this (and not only this) massage, the massage lines around the eyes run along the orbicularis oculi muscle, but on the upper eyelid, just like in Europeans, from the inner corner of the eye to the outer, and on the lower eyelid - not from the outer corner to the inner, and again from the inner to the outer corner of the eye. In this regard, the exercise is performed in two stages, separately for the upper eyelid, and separately for the lower. A. Raise your hands to your face, spreading your elbows out to the sides parallel to the floor. Place the pads of your middle fingers at the outer corners of your eyes and lightly, without pressure, move them to the inner corners of your eyes, going around the corners themselves (both inner and outer - the Japanese call them the “head” and “tail” of the eyes). Stop at the so-called beauty spots. From them, with sufficient pressure, “describe” a hemisphere along the upper edge of the orbital bone to the outer corners of the eyes (which go around again) and stop for 3 seconds at the temples. Then, again lightly touching the skin, “complete” the circle under the lower eyelid again to the inner corners of the eyes, to the beauty points. B. From them, again with some effort, move along the infraorbital bone in the opposite direction, to the outer corner of the orbital socket. Hold near the outer corner of your eye for 3 seconds, applying light pressure to the points under your index and middle fingers. Then continue moving your hands towards your temples. Having fixed the points at the temples for 3 seconds, without pressing, go to the lymph node at the tragus of the ear, from there perform the final technique described above. Repeat the exercise 3 times. Exercise 3. Strengthens the mouth and chin area, awakening the canine muscle (the levator anguli oris muscle) and lifting the corners of the lips.
Place the middle and ring fingers of each hand in the hollow in the center of your chin. For 3 seconds, hold the point with your fingers, pressing on it with some force. Then, maintaining pressure, curl your fingers around the corners of your lips on both sides and connect your fingers at the center point above the upper lip. Press these points again with your fingers, trying to lift the nasal septum with your ring fingers. Keep pressure on these points for 3 seconds. Sharply lift your fingers from the hole above the upper lip, and without performing the finishing move, move them again to the hole in the center of the chin. Without a finishing move, repeat the exercise 3 times. After completing three repetitions, proceed to exercise 4. Exercise 4. Strengthening muscles and eliminating nasolabial folds
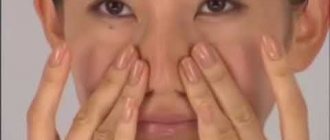
Immediately after completing exercise 3, smoothly move your fingers into the upper depressions of the wings of the nose and make 5 pressing movements down and up, as if you were drawing small figure eights on both sides directly around the wings of the nose. Then, removing the pressure, but without removing your fingers from the skin, smoothly move your middle and ring fingers to the upper part of the bridge of the nose and make 2-3 stretching movements from the central axis of the nose to the naso-cheek fold and back (from the eyes to the cheeks with force, back to nose - loosening the pressure). Having completed the exercise, press your hands towards the tragus of your ears and perform the final technique. Repeat the exercise 3 times. Exercise 5. Osteopathic exercise for the cheeks. Raising the corners of the mouth, upper jaw and zygomatic bone
Press the middle three fingers of your hands against the hollow in the center of the chin, as in exercise 3. Pressing quite firmly on the skin, muscles and bones, go around the corners of the mouth on both sides, and “dig” your fingers into the bone of the upper jaw near the nostrils, which should feel like “implanted” on the fingertips. Squeezing until you feel a slight pain and lifting the jaw up, “reach” your fingers to the cheekbone, then, without stopping, move your fingers further, to the very eyes. Stay for 3 seconds near the eyes, continuing to apply pressure to the skin. Then, spread your fingers to the temples, from there, reducing the pressure and reaching the tragus of the ears, perform the final technique. Repeat the exercise 3 times. After performing the exercise correctly, you should feel that your upper jaw and cheek bones have lifted upward, and your cheeks have plumped and plumped up. Exercise 6. Strengthening the lower part of the face - the “jowl zone” and lifting the cheeks.
The exercise is performed separately for each side of the face. Fix one side of your face to increase resistance, resting the center of your palm on the lower jaw bone. On the other side of the face, with an effort, dive three fingers of your hand from the beginning of the masticatory muscle (picture on the right), and with very strong pressure, move your fingers along the masticatory muscle, towards the eyes. Continuing strong pressure, linger at the eyes for 3 seconds, then, easing the pressure, move your fingers to the tragus of the ears and perform the finishing move. Repeat the exercise for the first side of the face 3 times in a row. Do the same steps three times for the other side of the face. Exercise 7. Strengthening the middle part of the face. Elimination of nasolabial folds. Facial correction after the previous exercise: spreading the cheekbones.
This exercise must be performed after the previous one, in exactly this sequence. Spread your elbows to the sides and place your fingers horizontally on your cheeks so that they “grab” the cheekbone. You can do the exercise as in the picture on the left, making a fist with your hands and working with the outside of your index fingers. Squeezing your nostrils tightly, forcefully move your fingers to the sides, towards the tragus of the ears, and perform the final technique. Repeat the exercise 3 times. Exercise 8. Osteopathic exercise. Against sagging cheeks
Just as in the previous exercise, spread your elbows to the sides and place your hands, folded into a fist, under your nostrils. Using the outer side of your index finger, apply pressure along the cheekbone to the tragus of the ears, from which, releasing pressure, perform the final technique. Repeat the exercise 3 times. Exercise 9. Osteopathic exercise. Face lifting.
The position from which we will begin this exercise is slightly different from the picture on the left. Bring your hands together in front of you at chest level so that your forearms and palms are connected, palms vertical, fingertips pointing upward. Then spread your palms upward, almost at an angle of 90 degrees, like the wings of a bird. Place your palms under your chin, press on your chin, which should overcome resistance, for 3 seconds. Then forcefully lift your still-spaced palms up your face. The thumbs then pass along the shell of the ears. The next step is the cheekbones, which should “lie” in your palms, which continue to press hard on your face. Press your cheeks with your palms, as if you were “throwing” your cheeks up. From the cheekbones, pressing with the bases of your palms, spread your hands to your temples along the trajectory shown in the figure. Then lower your hands to the tragus of your ears and perform the finishing move. Repeat the exercise 3 times. Exercise 10. Correction of the oval of the face. Straightening the right angle between the neck and chin
Place the heel of one hand under your chin, fingers pointing toward your ear. It is important to capture not only the jaw bone, but also the muscles located directly under the chin. With noticeable pressure, raise your palm to the tragus of the ear, from which perform the final move. Do the same action with your other hand on the other side of your face. Repeat the exercise for each side 3 times. Exercise 11. Eliminating the double chin and “squeezing” the face.
Place your palms in front of your face in a “prayer” position, with your thumbs pointing toward your neck at a 90-degree angle from the rest of your fingers. Then spread your palms in a diamond shape. Place your index fingers on your face so that your chin lies in the formed corner. “Hide” your nose between your palms. “Dig” your thumbs into the neck under the chin. In the upper area of the face, focus on the index finger. With your thumbs folded in this way, massage and knead the area directly under your thumbs. Do not “slide” out of this area with your thumbs. After this, forcefully move the remaining fingers of the hands in the upper part of the face to the temples, with the index fingers forcefully walking along the infraorbital area. Then perform the finishing move. Repeat the exercise 3 times. Exercise 12. Zigzag smoothing of the forehead
Spread your elbows out to the sides, parallel to the floor. Using the fingers of one hand, gently smooth your forehead from right to left from one temple to the other in a zigzag motion, without trying to move the skin, then make the same movements in the opposite direction. After this, smooth your forehead with both hands, making horizontal pressing smoothing movements, as in the first exercise, and then perform the final technique. Repeat the exercise 3 times.
Contraindications
1. Viral and infectious diseases.
If you have a fever, it is better for you to avoid facial massage, because under the influence of active movements of the hands and fingers, blood circulation accelerates, which can only “disperse” the spread of the virus throughout the body. The disease may drag on and complications may arise.
2. Skin inflammation and dermatitis.
Massaging infected areas of skin may increase their spread, making your sore condition worse. In addition, the number of lesions can increase several times, and the components of the oils can provoke their complications.
3. Skin atrophy.
Thin skin can cause mechanical damage during massage, including the formation of rosacea and bruising. If you have open skin wounds or burns, you should also avoid this procedure.
Our clinic performs:
- Spanish facial chiromassage.
- Japanese osteopathic facial massage.
- Mixed technique of classical and lymphatic drainage.
Any of the facial massage techniques selected for you is complemented by acupressure of the head, which has a positive effect on the condition of the hair.
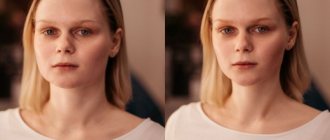
Professional rejuvenating facial massage allows you to change the condition of aging skin, weakened or tense muscles with a visible cosmetic effect after just a few sessions.
Photos before and after lymphatic drainage facial massage
Photos were taken after the first massage session. Courtesy: @kosmo_svetik
Photos were taken after the first massage session. Courtesy: @kosmo_svetik
Photos were taken after the first massage session. Courtesy: @kosmo_svetik
Photos were taken after the first massage session. Courtesy: @kosmo_svetik
Is it possible to remove fatty eyelid hernias with massage?
Massage can improve blood circulation in the face; some may even think that the shape of the face has changed, but we did not find a single review that reported that massage helped remove bags under the eyes.
From our consultations
Under the eyes, closer to the cheekbones, bags have formed. I had a consultation with a cosmetologist in another clinic, she advised me to fill my cheekbones with filler and the paint bags would be smoothed out.
The plastic surgeon refused to operate on me, saying that there were no clear indications, that I needed to find a cosmetologist and inject a dense filler just under the paint bags, onto the bone, and not touch the cheekbones. I don’t even know what to do, I’m completely at a loss. I went for a lymphatic drainage massage, but the effect is short-lived, it seems to smooth out for a couple of days, but then appears again. Maybe there are procedures that will get rid of them for a long time, but I don’t know.
You won’t be able to break, move, or even completely “dissolve” fat packets with your hands. How, by the way, to tighten sagging skin.
Massage performed by professional hands can be good as a preventive measure. And if the problem already exists, it needs to be dealt with in fundamentally different ways.
Rules for performing massage
In order for Asahi to give a positive result, it must be performed strictly according to the rules:
- massage is performed daily for 2-3 weeks, after – after 1 or 2 days, the whole procedure takes about 10 minutes;
- Before starting the massage, the skin must be cleansed;
- be sure to use oil or milk for massage;
- after the massage, it is necessary to remove any remaining oil or milk;
- all movements are performed standing or sitting, with a straight back;
- during the procedure, rubbing with fairly strong pressure is used;
- movements are performed with maximum effort, but so as not to cause pain;
- before the massage you need to find the lymph nodes, since all movements are performed from them;
- in places where the lymph nodes are located, you cannot press, only stroke;
- You need to perform a massage in a good and calm mood.
It would be a good idea to visit a specialist several times and learn from him how to properly perform Asahi massage.
Specifics of massage, who is it suitable for?
The uniqueness of Japanese massage is that it affects not only the surface of the skin, but also covers all its layers, connective tissues, muscle mass, and bones.
Muscle tone improves, thanks to which the oval of the face, which has lost its definition, regains its former attractive contours. Wrinkles disappear and the appearance of the skin improves. The main advantage of Asahi is that it accelerates the movement of lymph, which, in turn, more intensively removes toxins from the neck and face.
Japanese drainage facial massage is suitable for those who want to: get rid of puffy eyes, stimulate lymph movement, improve skin color, smooth out wrinkles, restore clarity to the oval of the face, get rid of a double chin.
Features and contraindications
Any type of massage can be combined with skincare programs from different brands. You should postpone the procedure if you have allergic rashes, skin damage (wounds, scratches, burns), as well as if you have Botox or fillers.
A preliminary visit to a bathhouse or hammam will help to enhance the effect of a manual massage with care: the facial muscles relax, the top layer of skin softens, which facilitates the rapid penetration of active components of cosmetics. After each session, the master gives recommendations on skin care for the face, body and décolleté and, at the client’s request, selects home care products from our range.
The duration of a premium care massage is from 1 to 2 hours, depending on the technique and cosmetics used. The short-term effect can be assessed after the first procedure, but to consolidate it, a minimum of 4-5 sessions are required at intervals of 1-2 weeks.
Manual massage is not a complete alternative to injection cosmetology. With its help, you cannot look 10–15 years younger, but it is quite possible to acquire a healthy, well-groomed appearance.
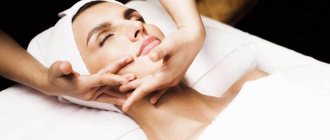
How is the facial massage procedure performed?
If you decide to resort to the most pleasant method of facial rejuvenation - massage, then after visual diagnostics and selection of a technique, you will have a preparatory stage of makeup removal, skin cleansing with a cosmetic product and the actual massage technique, lasting 40-45 minutes.
In our clinic you can get not only health and beauty by undergoing a course of massages from an experienced master, but also relaxation procedures, as well as additional recommendations on a healthy lifestyle, the observance of which will help you really preserve youth, and not imitate it.
Facial massage and many other relaxing procedures are carried out in our clinic in the Vyborg district of the city.f
How does Spanish chiromassage work?
Chiromassage affects the deep layers of the skin, unlike the classic version. Therefore, the result is much more noticeable.
After a course of procedures, the effect increases: the oval of the face is tightened , the special lip folds become smaller, the skin and muscles of the eyelids are strengthened . The procedures are aimed at relaxing the patient, they are pleasant and pain-free.
What is Japanese massage based on?
Japanese facial massage Asahi or Zogan is a technique of deep impact on the skin, muscles and bones of the human skull. Gives a rejuvenating effect. The massage therapist works with force on the entire face, with the exception of the area of the lymph nodes.
One of the features is the detoxifying effect:
- the massage therapist’s hands move along the lymphatic vessels,
- the outflow of lymph from the face and neck increases,
- toxins are eliminated.
Principles of mixed massage techniques
Classic massage techniques are combined with a gentle effect on the lymphatic vessels and gentle pressure (surge) in the area of the lymph nodes. To enhance the lymphatic drainage effect, a massage is performed in the cervical-collar area and décolleté area, where groups of lymph nodes are concentrated, through which lymph drains from the face.
Classic and lymphatic drainage facial massage techniques are more suitable for people suffering from chronic diseases of the gastrointestinal tract, kidneys, cardiovascular failure, metabolic disorders associated with fluid retention in the body, after a protracted recovery.
What is Asahi massage
Asahi massage, or, as it is also called, Zogan (translated as “facial creation”), was developed by Japanese cosmetologist Yukuko Tanaka, who described it in detail in her book “Facial Massage - Back 10 Years,” which became a world bestseller. The beauty expert took ancient Japanese techniques as a basis, systematized them and reduced them to a simple and short (from 3 to 10 minutes) complex. The name of the massage - Asahi - is translated from Japanese as “morning sun”; this name was given to it by enthusiastic admirers.
Photo source: Photo by Hanny Naibaho on Unsplash
The principle of facial massage
Interesting fact : on the facial part of the human skull there are 57 muscles, which, like the muscles of our body, need to be trained to maintain their normal tone. Mimic muscles, contracting, shift certain areas of the skin and change facial expression. Where the muscles are in a contracted state for a long time, wrinkles form on the skin that loses moisture, in areas with atonic muscles - folds, sagging, the “jowls” and “double” chin that we so hate.